Routing system audio on macOS
macOS blocks apps from hearing the audio your computer is playing. This is the one-time setup to fix that; takes about 3 minutes and it's completely free.
Why this is needed
On Linux, audio apps can tap into the system's output via pulseaudio monitor.
On Windows, it's WASAPI loopback. macOS has no equivalent built in; Apple
keeps the output stream sealed off from recording. To get system audio (Spotify, YouTube,
Rekordbox, anything playing on your Mac) into Conductør, we route it through a free
virtual audio driver called BlackHole and a
Multi-Output Device that plays to your speakers and BlackHole
at the same time.
Set it up once and Conductør remembers it forever. If you're using a mic, an audio interface, or MIDI input instead of Mac playback, you can skip this entirely; you're already set.
/Applications/Utilities/), and about 3 minutes.
01Install BlackHole
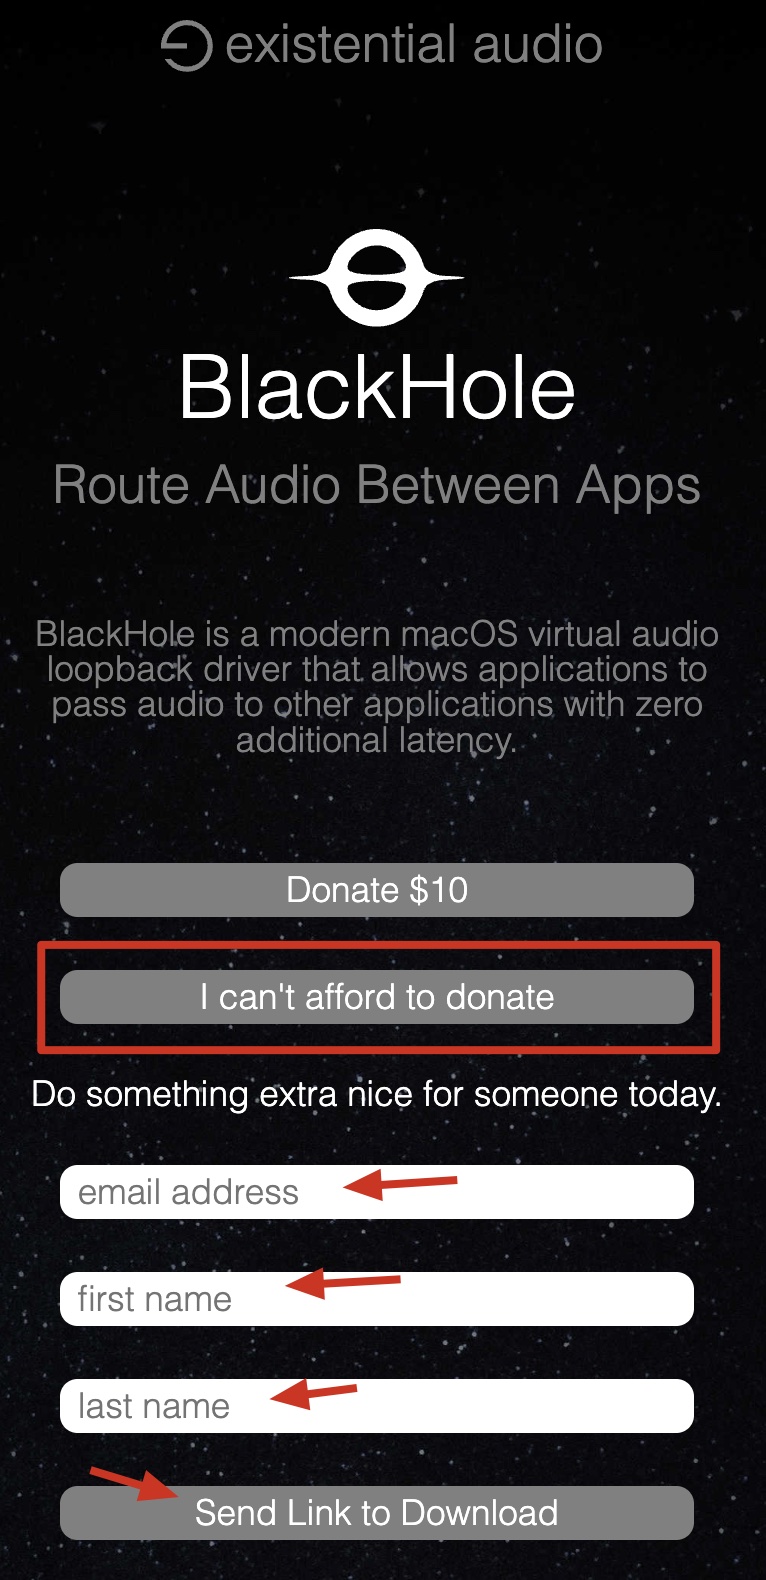
Head to existential.audio/blackhole. The site uses a donation-first flow that can throw people off if you don't know what to expect: there's no direct download button. You'll see two options, "Donate $10" and "I can't afford to donate." Both get you the same software; the second one is free and skips payment entirely.
Click "I can't afford to donate," fill in your email and name, and hit
"Send Link to Download." The download link arrives by email within a
minute or two. It'll come from noreply@existential.audio (check spam if it
doesn't show up).
brew install --cask blackhole-2ch skips the email dance entirely. You'll
still get prompted for your Mac password (it's a kernel extension install), but no email,
no forms, no waiting.
When the email arrives, grab the BlackHole 2ch version specifically.
The 16ch build exists but is overkill for this; 2ch is what every guide assumes.
Run the .pkg; it's a standard Mac installer, asks for your password, finishes
in a few seconds. No Mac restart needed. If Spotify, Music, or your browser was already
open, you may need to quit and reopen it so they refresh their list of audio outputs.
02Create a Multi-Output Device
A Multi-Output Device sends audio to two destinations at once: your speakers or headphones (so you can hear the music) and BlackHole (so Conductør can react to it).
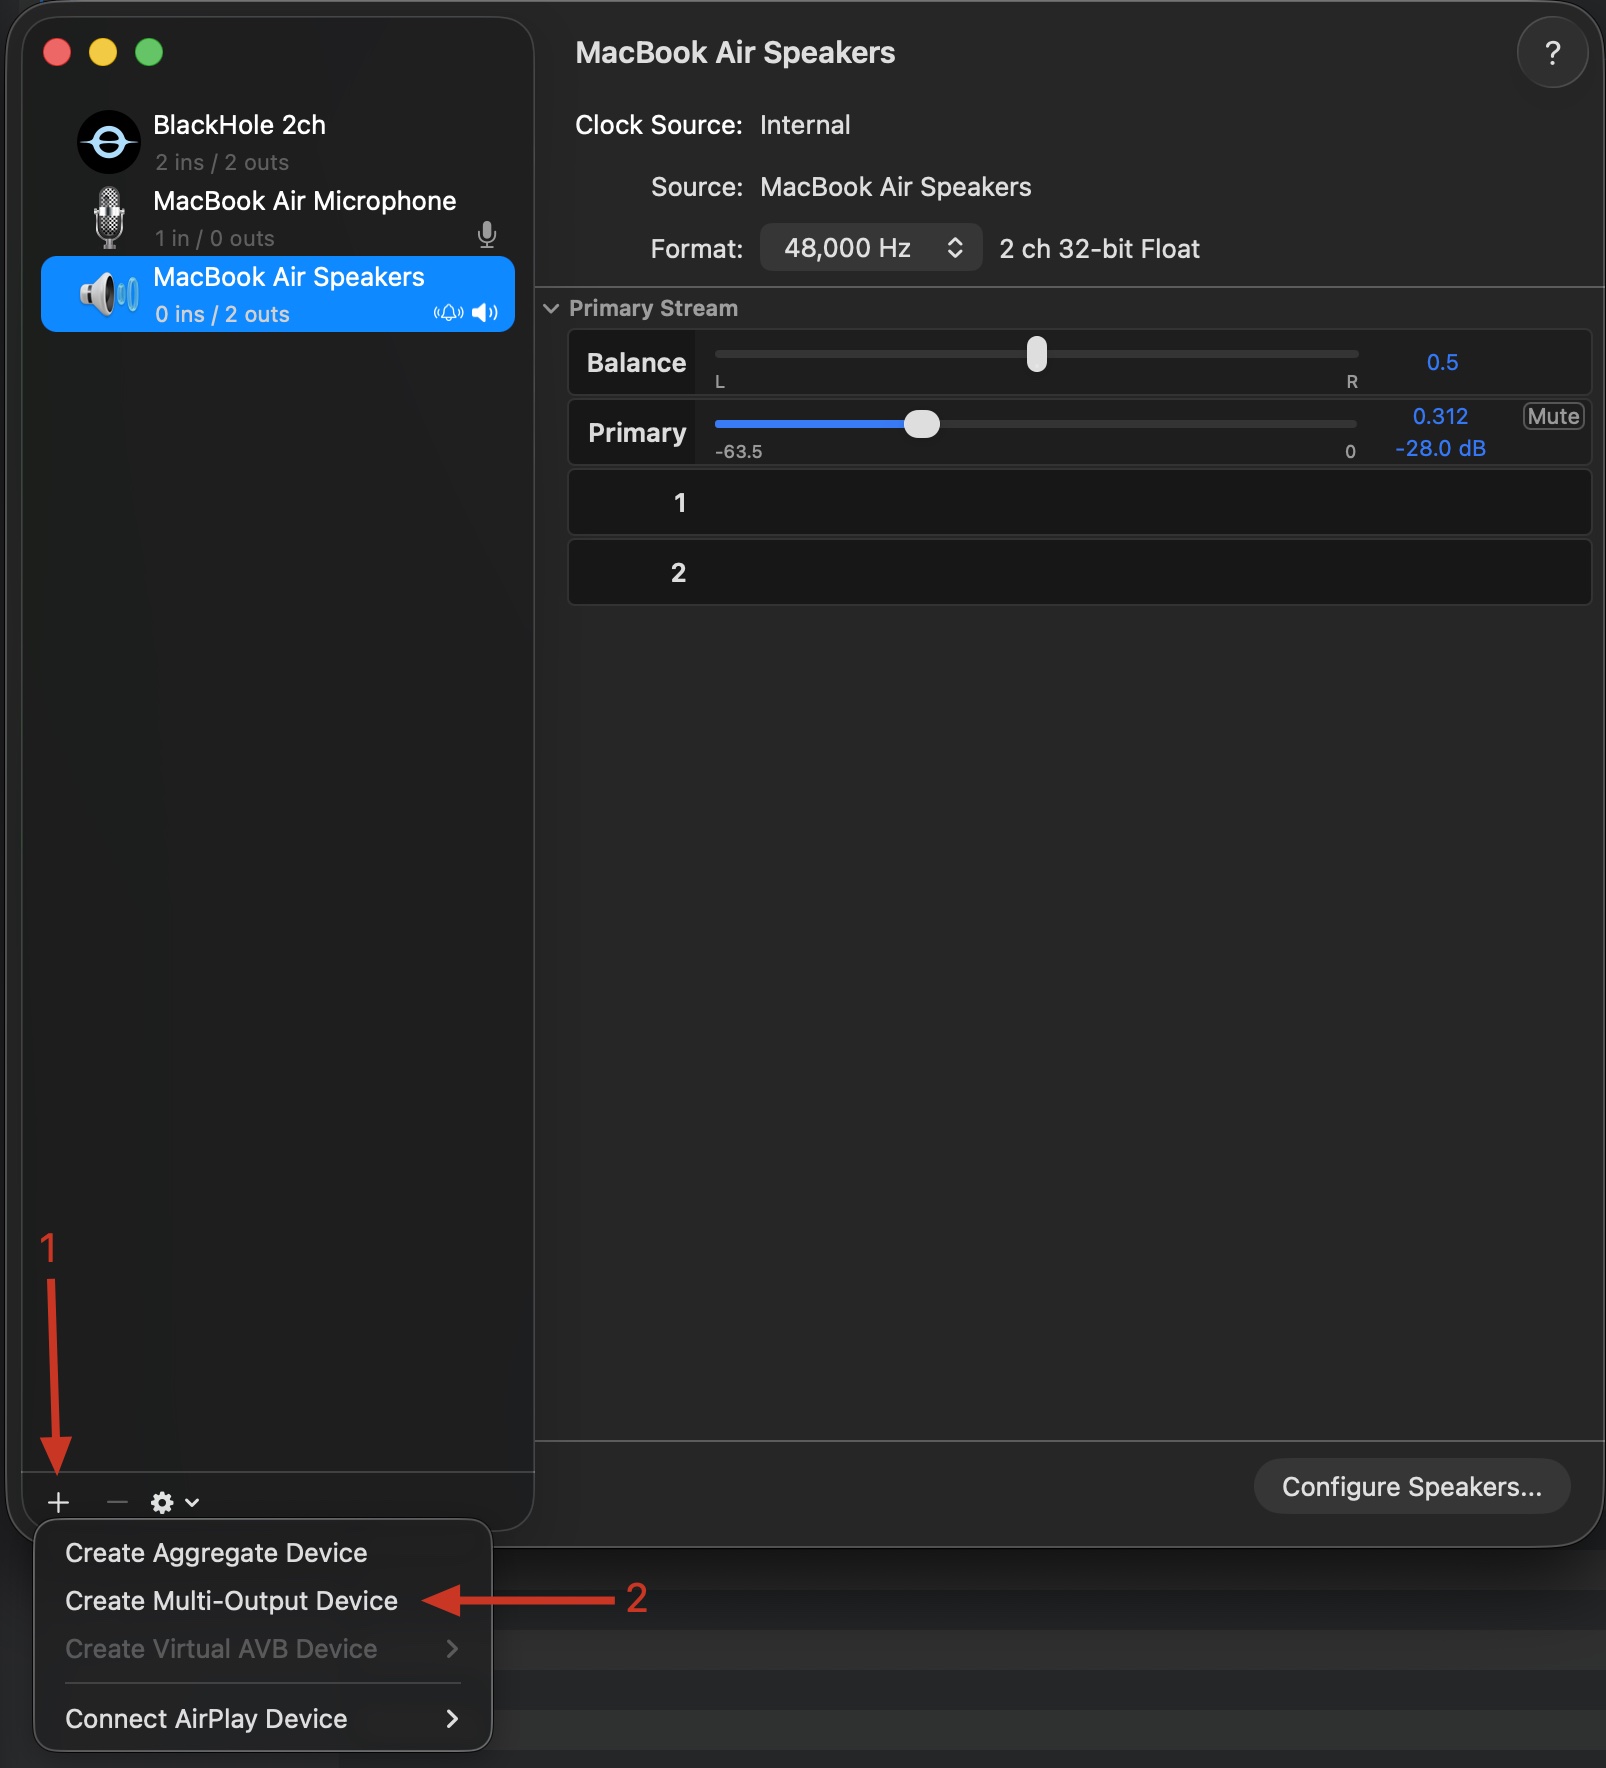
Open Audio MIDI Setup (Spotlight it, or find it in
/Applications/Utilities/). Click the + button in the
bottom-left corner and pick Create Multi-Output Device.
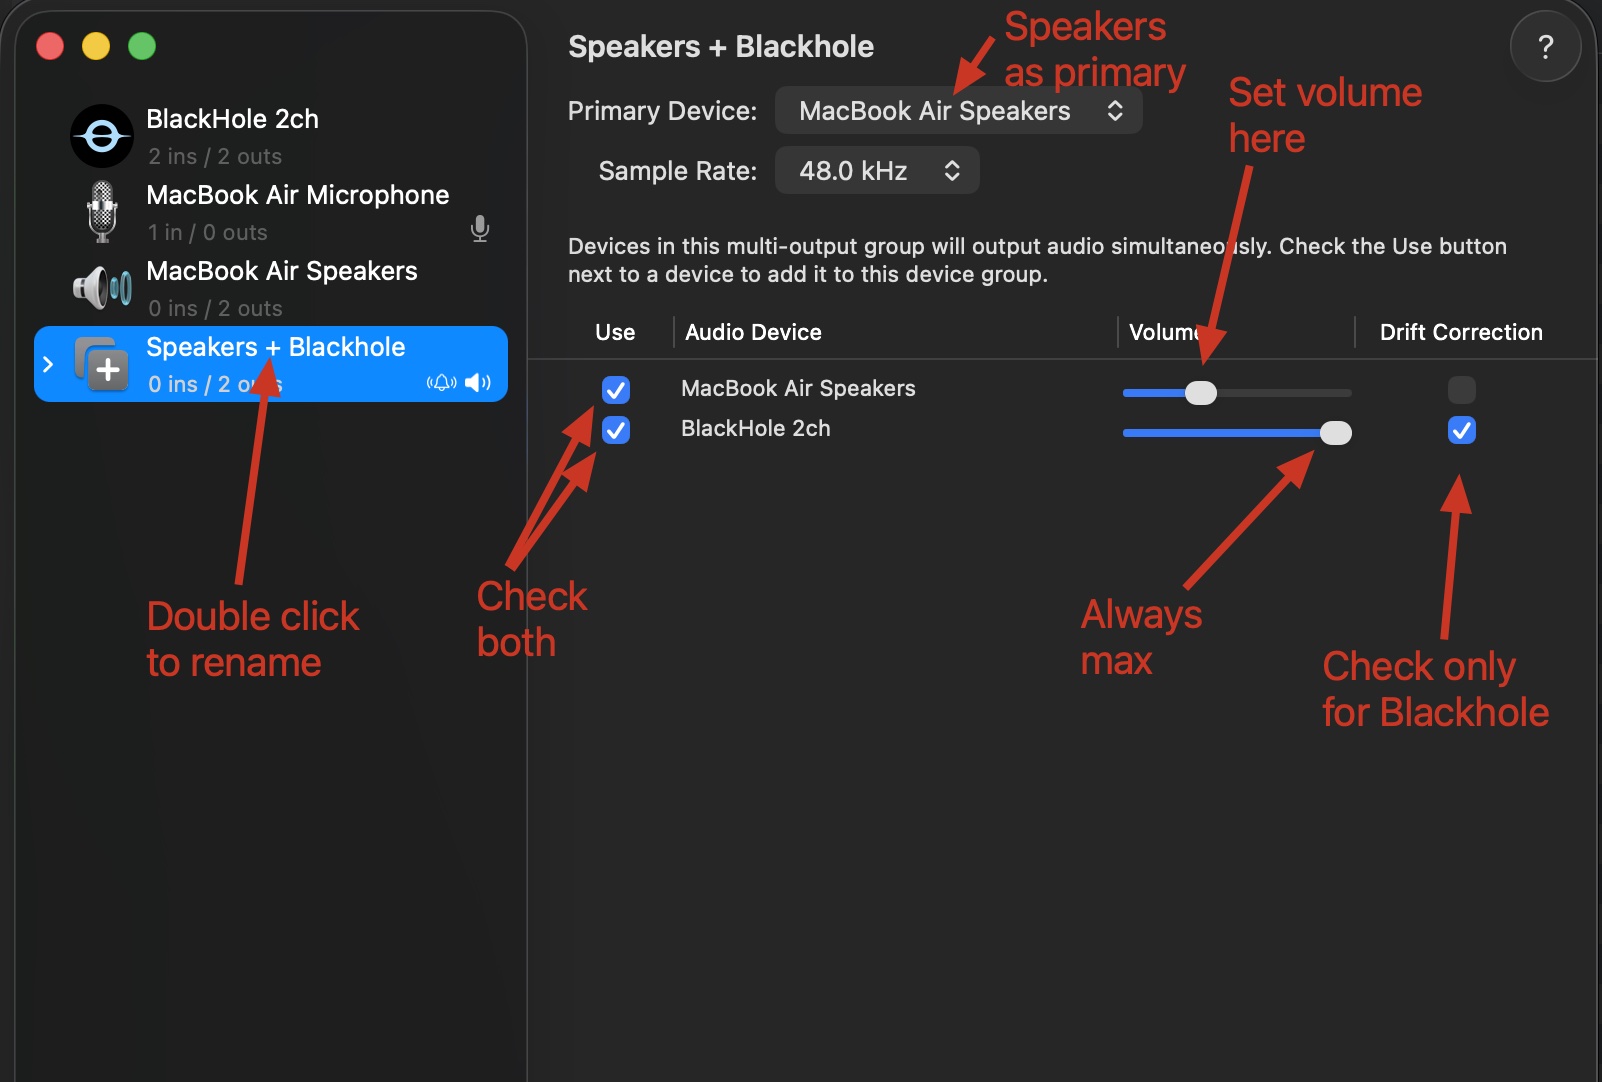
Your new Multi-Output Device will appear in the left sidebar. Double-click its name to
rename it to something you'll recognize; Speakers + Blackhole works well.
Hit Return to commit the rename; if you just click away, the new name
won't stick. Then set it up like this:
- Set your speakers (e.g. MacBook Air Speakers) as the Primary Device.
- Check the "Use" box for both your speakers and BlackHole 2ch.
- Set the speaker volume where you like it; BlackHole's volume should stay at max (that's the signal Conductør listens to).
- Check "Drift Correction" for BlackHole only. This is the step everyone misses, and leaving it off causes audio to slowly drift out of sync during long sessions.
03Make it your system output
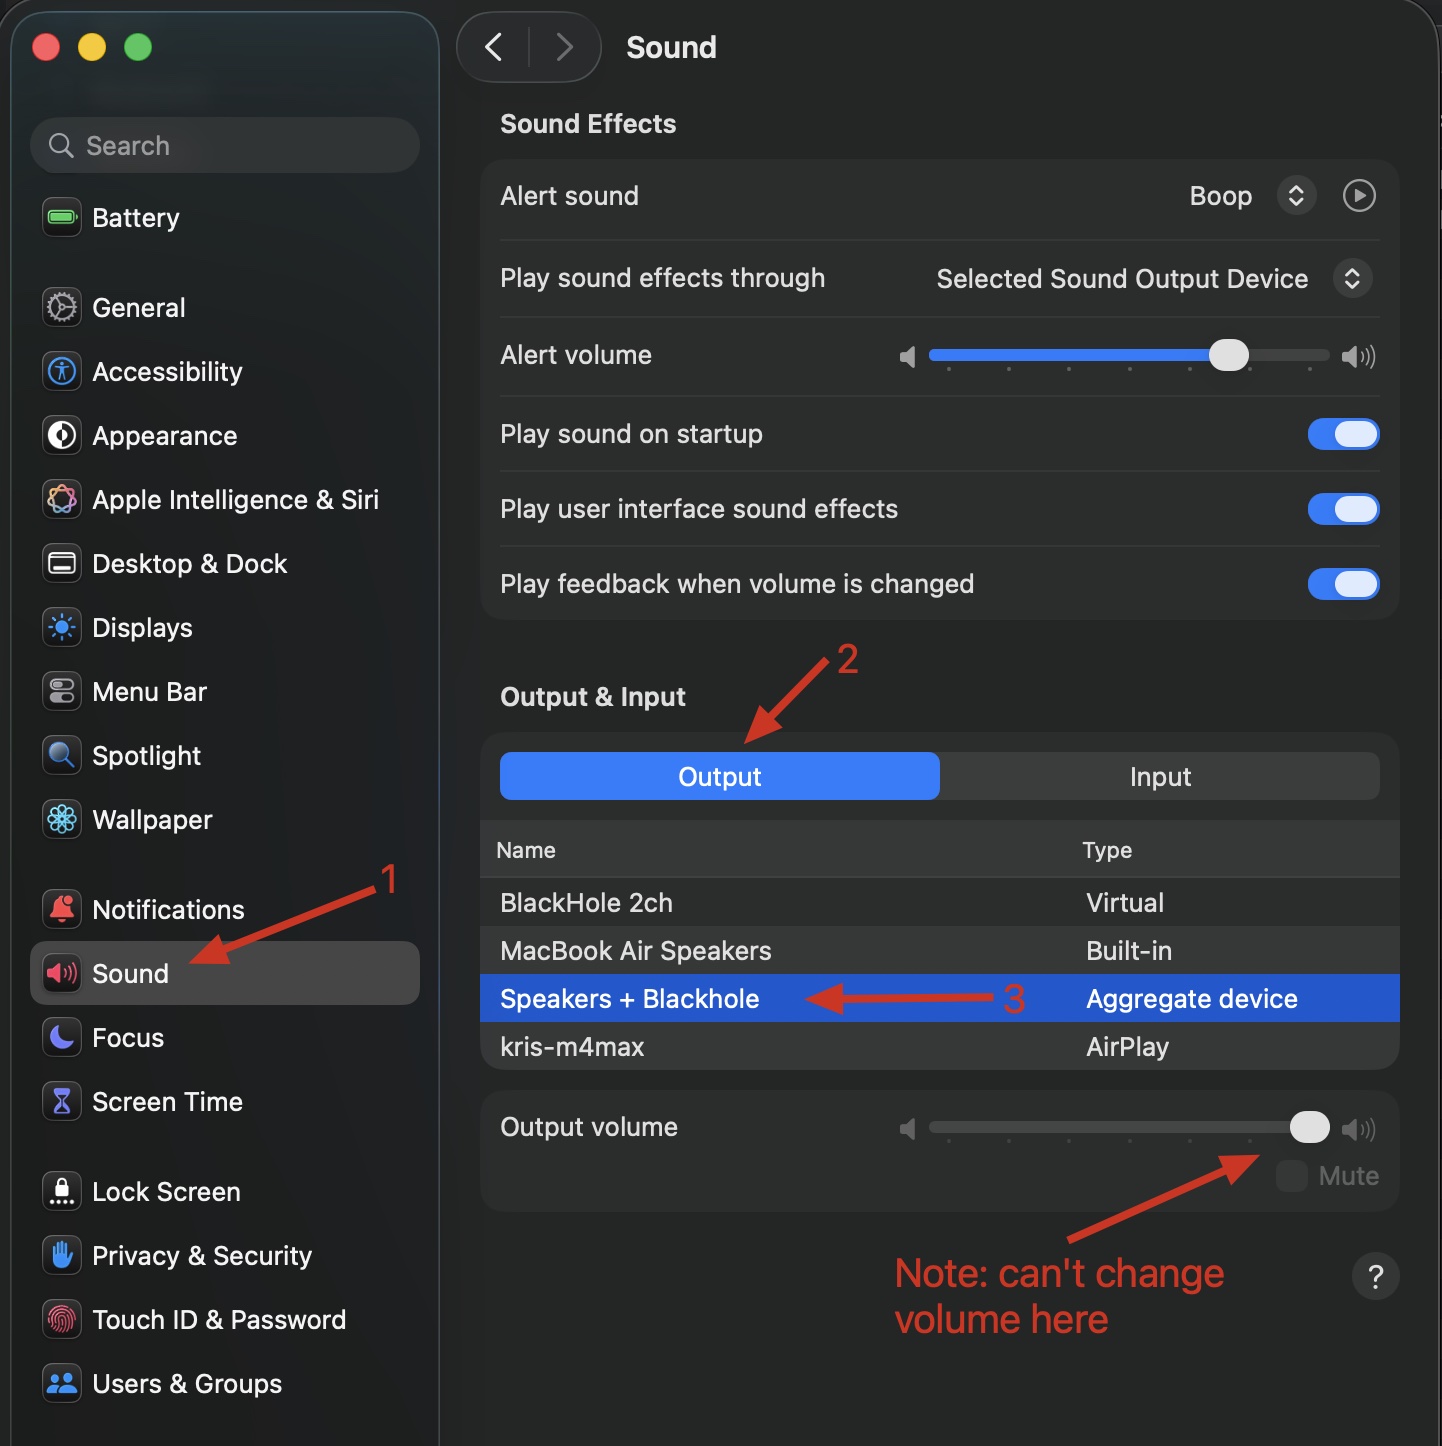
Your new Multi-Output Device exists but isn't the active output yet. To switch to it, open System Settings → Sound → Output and select the Multi-Output Device you just created.
04Pick BlackHole in Conductør
Last step, and it's the easy one. In Conductør, go to Settings → Audio and pick BlackHole 2ch as the input device, then click Save.
Conductør will auto-detect BlackHole in the background, so the onboarding modal goes away within 30 seconds of BlackHole being set up; no need to restart the app.
Troubleshooting
- No sound coming out of my speakers. You probably still have the built-in speakers selected as output. Double-check System Settings → Sound → Output is set to your Multi-Output Device, not "MacBook Air Speakers" alone.
- Conductør says "no signal" even with music playing. Usually one of three things: (a) BlackHole 2ch isn't checked in your Multi-Output Device, (b) the Multi-Output Device isn't the active system output, or (c) Conductør's input device is set to your mic instead of BlackHole. Walk back through steps 2–4.
- Audio sounds delayed or out of sync over a long session. Drift Correction is probably off on BlackHole. Open Audio MIDI Setup, select your Multi- Output Device, and check the Drift Correction box on the BlackHole row.
- I'd rather pay for a nicer UI. Loopback by Rogue Amoeba ($109) does the same job with a prettier interface. BlackHole is free and works identically; pick based on taste.